
Crimp height inspection compares a formed terminal with the specification for its exact wire and tooling combination. You need a defined measurement location, suitable equipment and traceable results. Use height alongside visual and mechanical checks, rather than treating one dimension as complete proof of crimp quality.

What Does Crimp Height Inspection Tell You?
Crimp height inspection checks a specified dimension of the formed conductor barrel; it does not evaluate every termination feature.
Your inspection must identify the conductor crimp separately from the insulation support. These features perform different jobs and require different acceptance criteria.
A useful height record answers a precise question. Did this sample meet the approved dimensional requirement at the defined measurement location?
It cannot answer every question about strand preparation, contact damage or housing retention. Keep those checks visible in your inspection plan.
For purchasing, this distinction prevents a common documentation gap. A report labelled “crimp passed” may omit what was actually measured.
Ask for the measured characteristic, applicable limits and inspection method. A pass symbol without that context gives you little comparison value.
This article focuses on height measurement and its production records. For broader process context, see our wire harness crimping guide.
Where Should Your Acceptance Limits Come From?
Your limits should come from the applicable component and tooling documents, reconciled with the approved customer specification.
Start with the exact terminal part number. Then identify the wire construction, conductor size and specified tooling arrangement.
Record document numbers and revisions, not just the connector brand. Different contacts within one connector family can require different processing details.
One published example shows why this matters. Molex tooling specification 2133092400 addresses named terminals and two specified wire styles.
It distinguishes conductor dimensions, reference insulation dimensions and tooling profiles. Its values belong to that documented combination, not every crimp.
Do not copy an example value into a drawing for another terminal. Ask the responsible engineer to resolve missing or conflicting requirements.
If your drawing and supplier document disagree, resolve that conflict before production. A purchasing note should not silently override engineering approval.
Also distinguish a required limit from a reference dimension. Treating both as identical acceptance rules can produce unnecessary rejects or false approvals.
Keep the resulting requirement accessible to production and incoming inspection. Both parties should evaluate the same characteristic using the same revision.
How Do You Define The Crimp Height Measurement Location?
Define the measuring surfaces and longitudinal position using the applicable terminal drawing or application specification.
For its CP1.5 terminals, Molex application specification AS-64323-001 illustrates a blade-and-point measurement arrangement.
Its procedure locates the measurement away from the bellmouth and distinguishes the intended radial surface from extrusion points.
Use that document only for its applicable scope. Your selected terminal may need a different drawing, position or inspection arrangement.
On your inspection instruction, show where the operator places the instrument. A written dimension name alone may leave room for disagreement.
Define specimen orientation and any inaccessible features. If the crimp enters a housing afterward, schedule measurement before access disappears.
A photograph can help identify the location, but it cannot replace a dimensional definition. Include the controlling drawing reference beside it.
When two inspectors obtain different results, compare their contact locations first. They may be measuring different features despite using identical instruments.
Avoid adding an unspecified measurement at the most convenient point. Convenience does not establish equivalence with the required characteristic.
What Must Your Measurement Method Specify?
Your method should identify the instrument, contact geometry, specimen positioning and evidence that the measurement suits the tolerance.
Instrument display resolution is only one consideration. You also need confidence that the contact surfaces reach the intended terminal features.
Describe instrument identification and calibration status in the inspection instruction. Follow the instrument manufacturer’s guidance for operation and care.
Before approving the method, ask inspectors to repeat measurements on identified samples. Compare results between operators using the same written procedure.
This practical comparison can reveal positioning ambiguity. It is not a substitute for a formal measurement-system study when your program requires one.
Agree how you handle results close to a limit. Use the customer’s decision rule and applicable measurement requirements rather than rounding opportunistically.
Retain the actual measured values at the agreed precision. Recording only “OK” hides variation and makes later investigations harder.
If an optical or sectioning method is proposed, review equivalence before substituting it. Different preparation and contact methods can answer different questions.
Do not assume a general dimensional machine proves every crimp-height requirement. Match the method to the specified feature and acceptance evidence.
| Method Detail | What Your Instruction Should Identify | Why It Matters |
|---|---|---|
| Characteristic | Conductor height and controlling drawing | Separates it from insulation support |
| Position | Specified location and specimen orientation | Prevents comparing different surfaces |
| Equipment | Instrument identity and suitable contact geometry | Connects readings to the method |
| Recording | Units, precision, limits and sample identity | Makes results reviewable |
| Decision | Applicable acceptance and escalation rules | Controls borderline or conflicting results |
How Should You Approve A New Crimping Setup?
Approve a setup by linking representative samples, documented settings and required inspection results before releasing the production run.
The following sequence is a planning framework, not a replacement for equipment instructions. Your approved control plan determines the actual sequence.
Confirm The Inputs
Match terminal identification and wire specification to the released BOM. Include relevant wire and terminal lot references in the setup record.
Confirm that the selected tooling is approved for the combination. Do not infer compatibility from the connector housing or conductor gauge alone.
Review strip preparation before judging the formed barrel. An apparent dimensional issue may accompany a preparation problem that also needs correction.
Inspect Identified Setup Samples
Collect the sample quantity required by your governing instructions. Identify each sample so its dimensional and complementary results remain connected.
Record individual measurements rather than only their average. An acceptable average can conceal an unacceptable individual result.
Complete the specified visual checks before accepting the setup. Review any required destructive evidence using separately identified specimens.
Authorize The Production Baseline
Record the approved setup identity, document revisions and release decision. Define which subsequent changes require another approval.
Do not treat a retained sample as the sole specification. Samples support communication, while controlled documents define the acceptance requirement.
When prototype and production tooling differ, review the transition explicitly. A prototype approval does not automatically qualify another manufacturing route.
How Often Should You Check Crimp Height During Production?
Set inspection frequency through the approved control plan, considering product risk, process behavior and changes during the run.
There is no universal interval suitable for every harness. A fixed number copied from another program may miss your relevant risks.
Define checks at startup and at the required production intervals. Also identify events that trigger additional verification.
Possible review events include tooling maintenance, material changes, a machine interruption or an unexplained measurement shift. Choose triggers for your actual process.
State who can restart production after a failed check. The operator and quality reviewer should understand the same release conditions.
Keep sample order and timestamps where they support traceability. A chronological record helps you locate when a process change occurred.
If you inspect multiple tooling cavities or independent stations, keep their identities separate. Combining unlike results can obscure the source of variation.
For supplier comparison, ask whether quoted inspection covers setup samples or ongoing checks. Those scopes require different labor and documentation.
Use process data to review the plan over time. Change inspection frequency through approval, rather than quietly reducing checks after several good batches.
What Should You Do When Results Drift Or Disagree?
Investigate the measurement and process together, while controlling potentially affected product under the approved nonconformance procedure.
Molex’s TM42 manual identifies material changes, tooling condition and measurement error among possible causes of height variation.
Its troubleshooting guidance supports checking more than the adjustment setting. Do not assume every unexpected reading means the press needs adjustment.
First, preserve sample identification and the original results. Repeatedly measuring unidentified replacement samples can erase the evidence you need.
Check the instrument condition and specimen position against the instruction. Confirm units and the correct limit before comparing readings.
Then review recent changes in wire, terminal lot, tooling or setup. Record findings without declaring a root cause before evidence supports it.
Define the affected production window using available traceability. If the boundary is uncertain, escalate it rather than inventing a precise cutoff.
Do not average away a failed sample or repeatedly adjust until one reading passes. Both practices can hide the original problem.
After corrective action, complete the agreed reapproval checks. Keep disposition of suspect material separate from approval to resume production.
If customer and supplier measurements disagree, exchange the written methods first. A joint review of identified samples may resolve the difference.
When the disagreement remains unresolved, agree an independent evaluation route. Do not switch methods solely because another method gives a preferred result.
How Do Height Checks Differ From Cross-Section And Pull Tests?
Height, cross-section and pull testing examine different evidence, so your inspection plan should define their separate purposes.
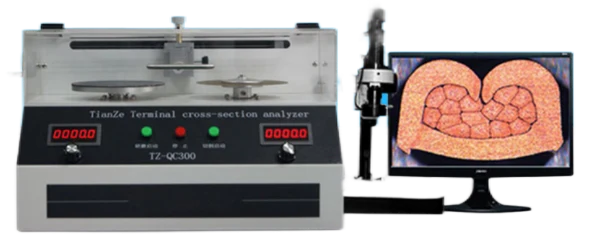
A dimensional height reading addresses the specified external characteristic. A prepared cross-section exposes internal geometry at the chosen section plane.
For section analysis, identify the specimen and preparation location. The report should show which acceptance features were evaluated against which document.
Do not use a magnified image without a scale or sample reference as complete acceptance evidence. Confirm the reporting requirements beforehand.
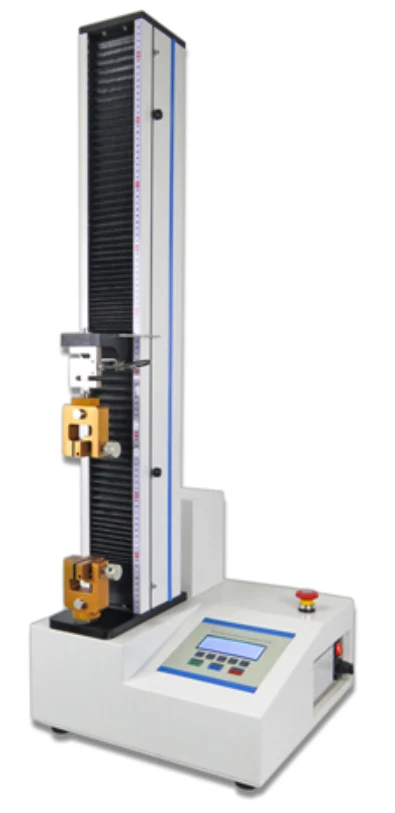
A pull test evaluates the mechanical attachment under its specified test method. It does not replace measurement of a required height characteristic.
Housing retention is another interface entirely. Our crimp pull force and terminal retention comparison explains that distinction.
Similarly, continuity does not establish that a conductor crimp meets all geometry requirements. Keep each acceptance decision linked to the relevant evidence.
When destructive sampling is required, account for the extra terminals and wire. Identify test samples separately from assemblies intended for shipment.
Can Automatic Monitoring Replace Manual Crimp Height Inspection?
Automatic monitoring can add process evidence, but its role must match the system’s validated capability and your approved control plan.
TE’s CQM Pro documentation distinguishes height analysis from other methods, including peak-force and curve-based analysis.
That distinction matters when you review a supplier claim. “Crimp monitoring” does not tell you which characteristic the installed system evaluates.
Ask what is measured, what is inferred and how the program was established. Also ask how rejected parts are contained.
Confirm the monitoring configuration for your exact production route. A capability available on one machine may not apply to another station.
Review how the system detects changes and how its baseline is approved. Keep monitoring settings under the same relevant change controls.
Where manual verification remains required, retain it. Remove or replace a check only through the agreed engineering and quality approval process.
This is a supplier-evaluation checklist, not a claim that XSD operates the named TE system. Request project-specific confirmation of available monitoring.
What Should A Supplier Crimp Height Report Include?
A useful report connects each measured value with its sample, specification, method and production context.
Request records that another reviewer can understand without interviewing the original inspector. Use consistent field names across first-article and production reports.
Identify the harness part number and drawing revision. Include the terminal reference, wire specification and applicable inspection document.
List the instrument identity, inspection date and responsible inspector. Where required, include calibration references and measurement-system approval information.
Show units and limits beside the results. Avoid mixing inches and millimeters in an unlabeled spreadsheet column.
Preserve individual readings and the sequence of samples. If summary statistics are requested, provide them alongside the underlying data.
Record deviations and their approved disposition. A report should not turn a conditional concession into an unconditional pass.
For section images or pull results, maintain matching specimen references. The reader should know whether results concern one sample or different samples.
Agree retention and delivery requirements before ordering. Routine records and a customer-specific first-article package may involve different preparation work.
| Report Field | Purchasing Review Question |
|---|---|
| Product And Revision | Does this record match the ordered harness? |
| Terminal And Wire | Does the approved combination match production? |
| Document And Limits | Can you identify the controlling acceptance requirement? |
| Method And Equipment | Can another inspector reproduce the intended check? |
| Samples And Values | Are individual results traceable? |
| Disposition | Were deviations resolved by authorized approval? |
How Do You Compare RFQs Without Over-Specifying Inspection?
Compare quotations against one defined inspection scope, while selecting evidence that addresses your actual product requirements.
Include required height inspection, complementary testing and reporting deliverables in the RFQ. Ask suppliers to identify exclusions clearly.
Separate initial setup approval from recurring production inspection. Also distinguish retained factory records from reports delivered with every shipment.
More inspection can increase sampling, preparation and reporting effort. Require it where justified, rather than requesting every available test automatically.
For example, destructive sectioning requires specimen preparation and evaluation. Decide when that evidence is necessary and what acceptance document governs it.
Ask how mixed terminal types affect setup and inspection. A harness with several termination combinations may need separate records for each.
Review prototype quantities, batch sizes and annual demand together. Inspection planning for a short trial differs from planning repeated production releases.
Do not request a tighter tolerance merely to sound demanding. First confirm the functional requirement and a suitable, agreed measurement method.
When a specification is incomplete, request technical clarification before comparing prices. Otherwise, different suppliers may quote different acceptance assumptions.
Approve substitutions through change control. A replacement wire with the same gauge may still require review of its termination compatibility.
What Can XSD Review For Your Crimp Height Requirements?
XSD can review the terminal process and inspection scope against your approved harness drawing and component requirements.
Our published manufacturing capabilities include terminal crimping, dimensional inspection resources, cross-section analysis and tensile testing.
Those resources do not establish one universal tolerance or inspection frequency. The agreed product specification determines which checks apply.
Send the terminal and wire references with the required documents. Include sample quantities, expected production demand and requested inspection records.
Identify any customer-specific qualification, monitoring or reporting requirement before quotation. Ask us to confirm the applicable manufacturing and inspection route.
Company certificates on the quality assurance page support quality-system review. They do not replace evidence for your selected termination.
Frequently Asked Questions
Use the exact terminal specification and agreed inspection method to resolve crimp-height acceptance questions.
Is There One Crimp Height For Each AWG Size?
No. Identify the terminal, wire construction and applicable tooling specification before selecting the requirement.
Is A Lower Crimp Height Always Better?
No. Target the approved range, not the smallest reading. Investigate out-of-range results using the specified acceptance process.
Can You Measure The Insulation Crimp Instead?
Not as a substitute for conductor crimp height. Label both characteristics separately when both require inspection.
Does A Passing Pull Test Prove Height Compliance?
No. A pull result and a dimensional reading evaluate different requirements. Apply both when your control plan requires them.
Can A Photograph Replace The Height Record?
A photograph can document appearance or location. It does not establish a measured dimension without an approved measurement method.
Should You Request Every Crimp To Be Measured?
Define coverage according to product risk and the approved process. Confirm what the proposed monitoring or inspection actually measures.
What If The Supplier Has No Applicable Limit?
Resolve the requirement before release. Do not use another terminal’s value or an undocumented factory preference.
Should A Wire Substitution Trigger Review?
Yes. Evaluate its compatibility with the approved termination and determine any required reapproval before production.
Define The Measurement Before You Order
Send your drawing, terminal and wire specifications, inspection requirements and expected quantities. Include the records needed for approval. Contact us to review your harness termination requirements.